So. It's been 6 months since my last post. In that time, you'd think that I would have finished the Maine and moved onto other ships. You'd be wrong of course. You see, dear Reader, that in the interim, that my wife and I obtained a little dog. She's half Golden Retriever and half Tasmanian Devil. Her name is Finn, and she's a great load of fun.

The other event that sucked up my time was a move from the Milwaukee area to the Chicago area. Yep, we managed to move at the right time...getting a premium for our home and managing to pick up a brand new home for what I consider a great price. My work commute has gone from a 110 mile round trip to 16 miles. It's doubtful, I'll make that up in modeling time however!
So when I was last working on the Maine I was attempting to solder the masts together. I can tell you that doing one fairly quickly turned out to be a bit of luck. Getting a second one made to the same standard turned out to be the devils own task. I spent numerous hours and cut a lot of brass trying to get it right. In the end I was successful.
I ended up making my own 3rd hand device as you can see below. It worked out OK but the wire that I used made it tough to get the parts aligned because of the inherent "springiness" of the whole design.


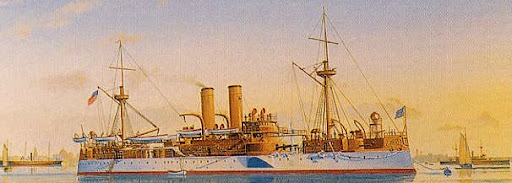
As you can see from the following pictures I finally got the masts made, painted and stepped into their holes on the deck. I have also managed to get the ratlines trimmed and attached. I used WEM ratlines that are very nice. I had to trim them with a pair of scissors that have the blades cut from titanium (so it says).

Once the ratlines were in place I was able to start placing the railing on the foredeck and the aft deck. Comparing the work that I did there to the bridge, I can see a definite improvement in my abilities. I would say that the key to getting good railings is to use small sections of railing. Much of what you see on the for and aft decks are numerous sections of railing pieced together. At the point the pictures were taken above, I still have the bend by the deck guns to do. What is in that picture is made up of 8 separate railing section with another 4 to be added. (joy)


I used spare ladder railing to add in the deck stairs since none are supplied on the PE sheet.

All in all, she's not looking too bad. With vacation time coming up, I hope I can complete her. Then I'll cover how I plan to build a case for her.

 The most complicated part of the weapon is the seven legged mount. Combrig supplies this part as photoetch. I cut the part loose on a piece of black ceramic tile that I sue as a cutting board. To bend the part I took a toothpick and rounded off the end with a sanding stick. I then placed the piece onto a soft cloth and pressed the toothpick tip into the center of the part. The legs were bent up by the cloth and the "give" in my finger tip.


